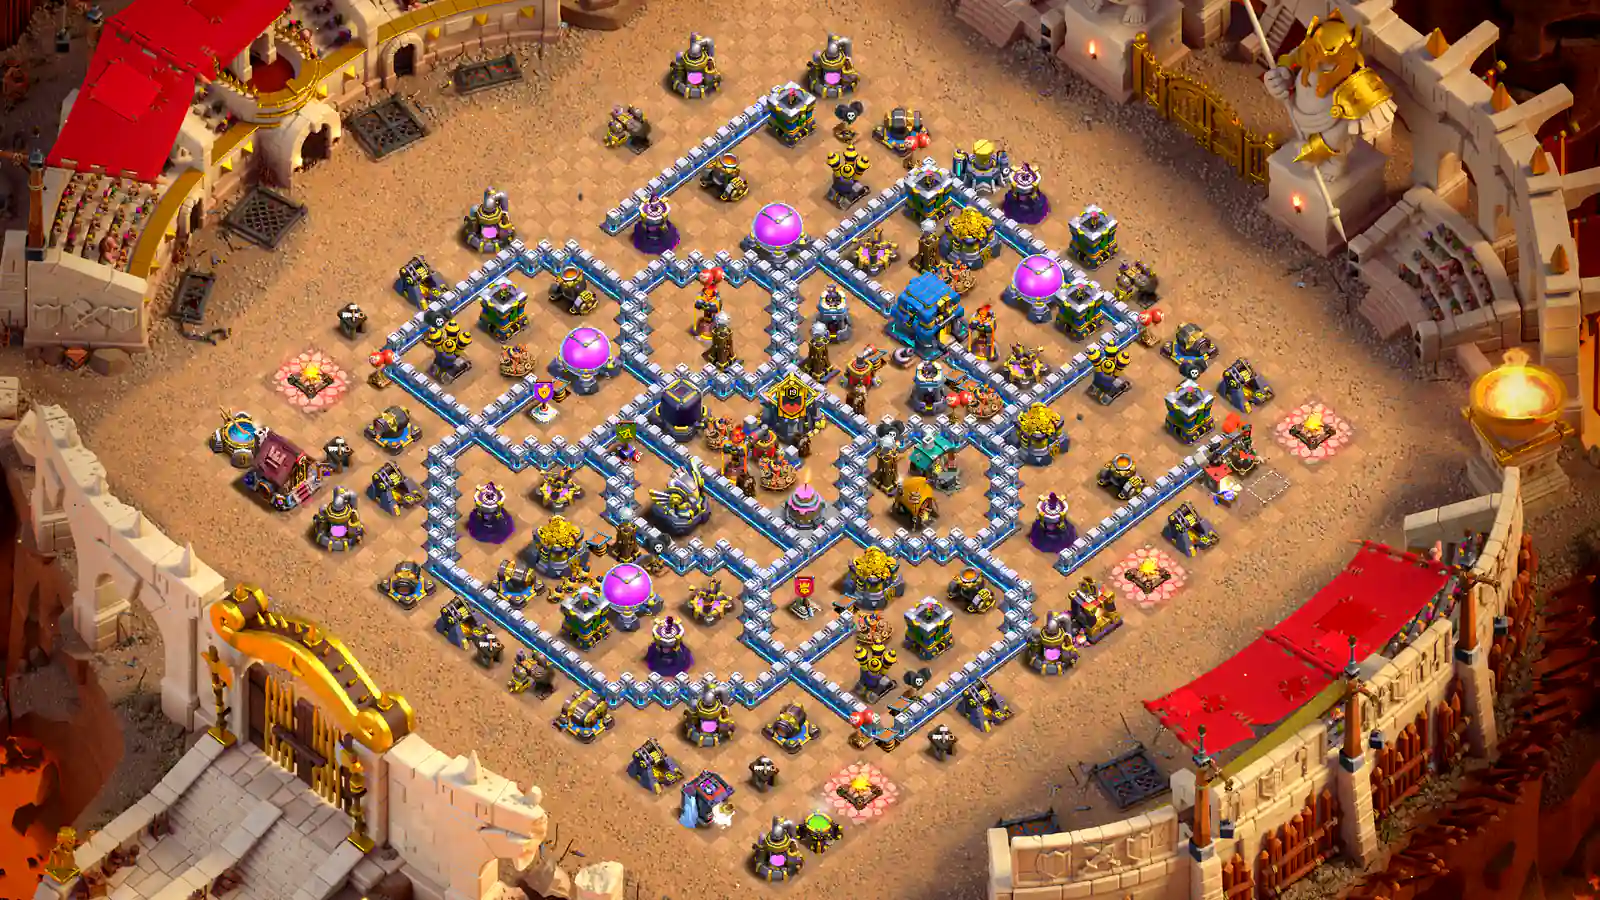
1. Offset Town Hall
- Compare the lower-left Town Hall entry with the route toward the Eagle.
- Trace the remaining Infernos after the opening clears one side.
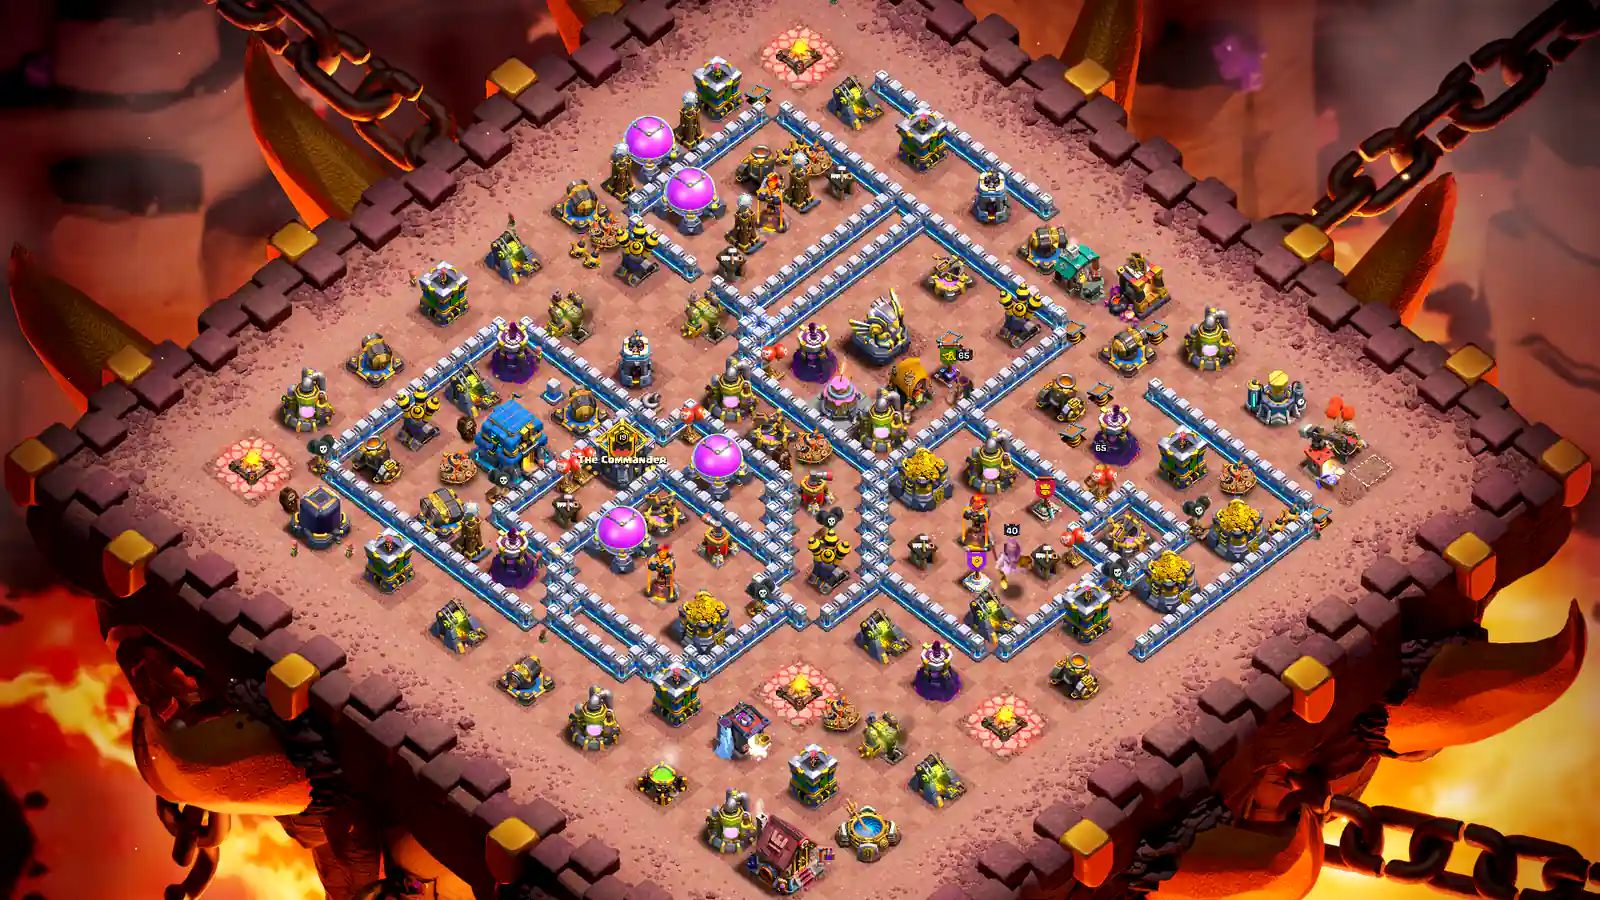
I’ve put ten TH12 layouts here. Look at the Town Hall entry, the Eagle and the route a ground army would take. Open an individual base page for its notes and the member copy link.
Want a central Town Hall? Compare 4, 6 and 9. For a Town Hall and Eagle in opposite wings, start with 8. Each card opens that layout’s own page.
Compare the Town Hall approach with the path to the Eagle. Picture the first section cleared. Which defenses are still up, and how would the rest of the army get to them?
| What you want to compare | Layouts | Where to look |
|---|---|---|
| Offset Town Hall entries | 1, 3, 5 | Access to the Town Hall and the next wall opening toward the Eagle |
| Ground pathing through wall channels | 2, 10 | Routes beside the core and openings that connect several compartments |
| Central Town Hall access | 4, 6, 9 | The funnel into the middle and the value available once troops reach it |
| A wider defensive footprint | 7 | Travel between the Town Hall, upper Inferno and right-side defences |
| Opposite Town Hall and Eagle wings | 8 | The route between the two wings and the defences left below them |
For air attacks, follow the Air Defences and remaining targets across the compartments. The walls alone do not establish the route an air army will take.
Choose a preview to inspect the full image. View base & notes opens the individual base page for placement notes and protected copy-link access.


When reviewing a Queen Charge, count the useful targets the Queen can reach after the first wall opening. Then look for the next barrier. If that opening connects the Town Hall, Clan Castle area and several major defences, the attacker may leave a much smaller job for the main army.
For a Hybrid attack using Hogs and Miners, follow the remaining defences after the Queen's section falls. Check whether the army has a narrow route through them or several branches to split across. For LaLo, inspect the Air Defence positions and the defensive targets Balloons can move toward after the opening.
Against Electro Dragons, look for nearby buildings that could support chains into valuable targets. Against a Lightning and Earthquake opening, compare the defences grouped around likely spell targets. A broad wall compartment can still contain tightly grouped buildings, so check the actual spacing.
Use friendly challenges to compare those entries. Record what the opening removed, where the main army went and which defences survived into the back end. Change one area at a time so the next replay gives you something useful to compare.
The protected copy links are on individual member base pages. Browse the CWB base library. Choose the matching card to open that base’s notes and protected copy section.
Start with layouts 4, 6 and 9. They place the Town Hall near the middle but arrange the Eagle and Infernos differently. Compare the route into the centre and the targets available once an attacker gets there.
Layout 8 places them in opposite wings. Layouts 1, 3 and 5 also put them in different sections. Compare the wall openings between those targets and the defences left after one section is cleared.
No. These notes describe visible placements and possible attack routes. Defence levels, settings, army choice and execution affect the result. Test the layout against the attacks your clan faces before keeping it for war.